Six Simple Steps to Adding Quilt Borders
Ditch the Math and Measuring to
Embrace your Inner Quilting Rebel!

Are you tired of meticulously following quilting patterns only to end up frustrated with the bordering process? Do you find yourself dreading the math and measurements involved in adding borders to your quilt center? Have the followed the pattern instructions precisely, only to have your borders end up being way too long? And the worst one yet – have you just cut your borders super long and slapped them onto the quilt, and then cut off the extra at the end? If so, it might be time to rebel against the conventional approach and embrace a more intuitive method. By the way, this technique works for one border — or many!
Adding borders to the center section of a quilt can indeed be a daunting task if you adhere strictly to pattern instructions. The constant calculations and measurements can take away the joy of quilting and leave you feeling overwhelmed. Quite often, your blocks don’t match the same size as the dimensions on the pattern instructions. Your borders may be significantly longer or shorter than the pattern recommendations. It’s not your fault! And don’t worry — we can fix this without any measuring tapes or calculators. No pencils, pens, chalk, paper — none of those things.
The most important thing to remember while making each block is to take your time. Each one of your blocks should be the same size – consistency is the secret. Practice good pressing skills with your iron, and then double-check all your blocks when you are done.
If the instructions told you that the finished size of each block should be 14 inches, and yours turn out to be 13 inches, it’s still easy to finish this quilt to the size that you want it to be. Modify your sash lengths to match your blocks (if your quilt has sashes), and when the top is complete and ready for borders you can follow this new simple method and find your own inner quilt rebel.
Borders don’t need to cause you anxiety — they’re a girl’s best friend! If you notice, for example, that adding a five inch border to each side will make your quilt too small, then simply change that width to whatever works for you. Want two borders? Sure, why not?
Don’t let the math overwhelm you. You can set your fabric next to your pieced quilt top and get a good idea of what looks right to you.
You can cut your border strips the correct width – but DO NOT TRIM THEM TO THE APPROPRIATE LENGTH UNTIL YOU FINISH READING.
It’s time to learn that there is another way—a rebel's way—to achieve beautifully bordered quilts without the hassle of precise measurements.
So, what's the secret? It's simple: ditch the math and embrace your intuition. Instead of meticulously following pattern instructions, trust your instincts and let your creativity flow. Read the six steps below.
1. Choose Your Desired Width: Begin by deciding how wide you want your borders to be. Whether it's 2 inches, 6 inches, or any other measurement, the choice is yours. This is where your creative vision comes into play—there are no right or wrong answers, only personal preference.
2. Cutting the Border Strips: Once you've settled on the width of your borders, cut strips of fabric accordingly. Remember, there's no need to fret over precise length measurements. Trust your eye and go with what feels right by adding a few extra inches.
3. Aligning the Strips: Lay both top and bottom border strips together and place them on top of the quilt center, ensuring they're positioned in the very center of the section. Again, don't worry about exact measurements—trust your instincts to guide you.
4. Trimming to Fit: With the border strips in place, trim them to match the length of the quilt center. This is where the beauty of intuition shines—you're not bound by rigid calculations but rather free to adjust and tailor the borders to suit your quilt's unique dimensions. Remember that the borders must be on the center of the quilt — NOT the edge.
5. Easing the Borders onto the Quilt: Pin the borders in place, then gently ease them onto the quilt top. Take your time and work slowly, allowing the fabric to conform naturally to the quilt center. Iron both borders to smooth out any wrinkles and ensure a neat, polished finish.
6. Repeat in the Opposite Direction: Once the top and bottom borders are secured, repeat the process for the side borders. Again, trust your intuition to guide you as you pin, trim, and ease the borders onto the quilt top.
By embracing this rebel approach to bordering, you'll not only simplify the quilting process but also infuse your projects with a sense of freedom and creativity. So, the next time you're faced with the daunting task of adding borders to your quilt center, remember to trust your instincts, leave the math behind, and let your inner rebel shine through. Happy quilting!

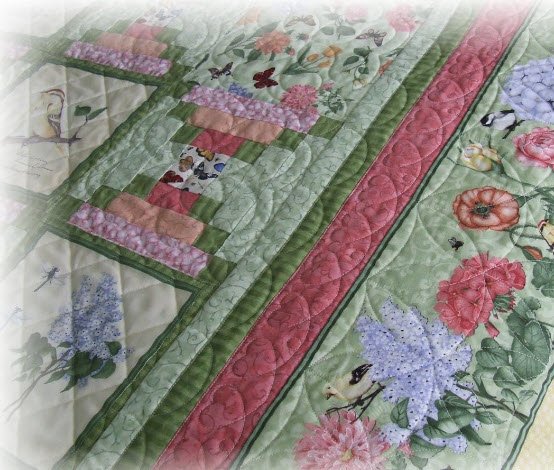
The arrows in the image above are pointing to your cutting lines. You can use a rotary cutter, or scissors.