Cross-Hatching Across Satin Stitches

<
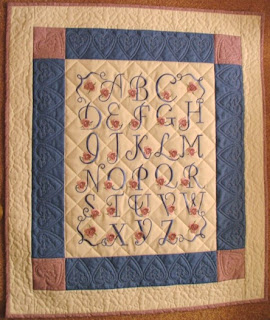
This one was a bit of a challenge --- but then again, I just LOVE a challenge! I received an embroidered quilt top that just "demanded" to be cross-hatched in the center. I didn't want to stitch across any of the letters, because that would squash the satin stitches. I also didn't want to do tie-offs at every letter, though.... so I came up with this little technique for "cheating".
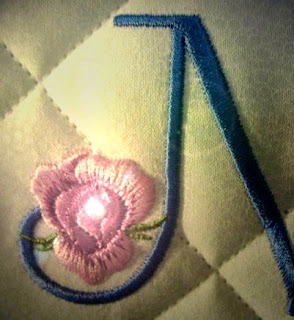
Do the cross-hatching as you normally would. Take a close look at the small photo that shows a close-up of the letter with the crystal in it. If you look at the blue satin stitch portion of the letter itself, you can see where I "jumped" over the blue portion of the letter during the cross-hatching process. The width of the jump stitch is less than 1/4 of an inch, but if I had stitched right through the letter, it would have crushed the satin stitches.
This was done with white thread, so as a result there were little tiny white jump stitches showing on most of the letters. I went to the fabric store, and bought a fine tip permanent fabric marker -- the kind with the tiny micron tip -- in exactly the same shade of blue as the letters. That's the most critical part -- matching the thread color.
Now, all you have to do is "color" the white thread that is laying on top of the satin stitches. The single thread will fade into the background of the satin stitches, and look just like another single stitch. On the back of the quilt, you will not want to cut those tiny stitches, or there will be some unraveling of your cross-hatching in the future.
For the jumps over the pink floral portion of the quilt, I did tie-offs, and started again on the other side.
And by the way, this alphabet is available from Platinum Embroidery! You will also be able to read a newsletter that has all of the instructions for making this wall-hanging project!
These letters stitch out beautifully! Enjoy!